
ArangoDB – Requisitos del sistema
AREAtutorial » Bases de Datos » ArangoDB – Requisitos del sistema
En este capítulo, discutiremos los requisitos del sistema para ArangoDB.
Los requisitos del sistema para ArangoDB son los siguientes:
Para todos los comandos de este tutorial, utilizamos una instancia de Ubuntu 16.04 (xenial) con 1 GB de RAM con un solo procesador que tiene una potencia de cálculo de 2,2 GHz. Y todos los comandos de arangosh en este tutorial han sido probados para ArangoDB versión 3.1.27.
En esta sección, veremos cómo instalar ArangoDB. ArangoDB viene prediseñado para muchos sistemas operativos y distribuciones. Para obtener más información, consulte la documentación de ArangoDB. Como se mencionó, usaremos Ubuntu 16.04×64 para este tutorial.
El primer paso es descargar la clave pública para sus repositorios –
# wget https://www.arangodb.com/repositories/arangodb31/
xUbuntu_16.04/Release.key
--2017-09-03 12:13:24-- https://www.arangodb.com/repositories/arangodb31/xUbuntu_16.04/Release.key
Resolving https://www.arangodb.com/
(www.arangodb.com)... 104.25.1 64.21, 104.25.165.21,
2400:cb00:2048:1::6819:a415,...
Connecting to https://www.arangodb.com/
(www.arangodb.com)|104.25. 164.21|:443... connected.
HTTP request sent, awaiting response... 200 OK
Length: 3924 (3.8K) [application/pgpkeys]
Saving to: ‘Release.key’
Release.key 100%[===================>] 3.83K -.-KB/s in 0.001s
2017-09-03 12:13:25 (2.61 MB/s) - ‘Release.key’ saved [39 24/3924]
Lo que importa es lo que tienes que ver Release.key guardado al final de la salida.
Instalemos la clave guardada usando la siguiente línea de código:
# sudo apt-key add Release.key
OK
Ejecute los siguientes comandos para agregar el repositorio de apt y actualizar el índice:
# sudo apt-add-repository 'deb
https://www.arangodb.com/repositories/arangodb31/xUbuntu_16.04/ /'
# sudo apt-get update
Como paso final, podemos instalar ArangoDB –
# sudo apt-get install arangodb3
Reading package lists... Done
Building dependency tree
Reading state information... Done
The following package was automatically installed and is no longer required:
grub-pc-bin
Use 'sudo apt autoremove' to remove it.
The following NEW packages will be installed:
arangodb3
0 upgraded, 1 newly installed, 0 to remove and 17 not upgraded.
Need to get 55.6 MB of archives.
After this operation, 343 MB of additional disk space will be used.
Haga clic en Entrar… El proceso de instalación de ArangoDB ahora comenzará –
Get:1 https://www.arangodb.com/repositories/arangodb31/xUbuntu_16.04
arangodb3 3.1.27 [55.6 MB]
Fetched 55.6 MB in 59s (942 kB/s)
Preconfiguring packages...
Selecting previously unselected package arangodb3.
(Reading database... 54209 files and directories currently installed.)
Preparing to unpack.../arangodb3_3.1.27_amd64.deb...

Unpacking arangodb3 (3.1.27)...
Processing triggers for systemd (229-4ubuntu19)...
Processing triggers for ureadahead (0.100.0-19)...
Processing triggers for man-db (2.7.5-1)...
Setting up arangodb3 (3.1.27)...
Database files are up-to-date.
Cuando finaliza la instalación de ArangoDB, aparece la siguiente pantalla:
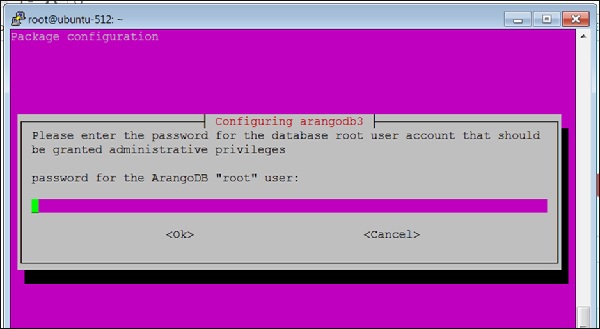
Aquí se le pedirá una contraseña para ArangoDB. raíz Usuario. Escríbalo con cuidado.
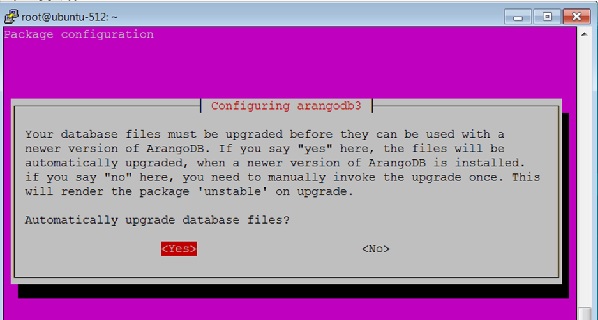
Por favor seleccione sí opción cuando aparece el siguiente cuadro de diálogo:
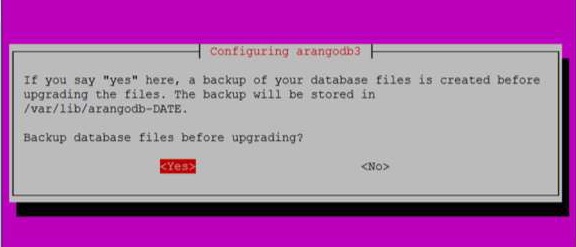
Cuando presionas sí como el cuadro de diálogo anterior, aparece el siguiente cuadro de diálogo. Haga clic en sí aquí.
También puede verificar el estado de ArangoDB usando el siguiente comando:
# sudo systemctl status arangodb3
arangodb3.service - LSB: arangodb
Loaded: loaded (/etc/init.d/arangodb3; bad; vendor pre set: enabled)
Active: active (running) since Mon 2017-09-04 05:42:35 UTC;
4min 46s ago
Docs: man:systemd-sysv-generator(8)
Process: 2642 ExecStart=/etc/init.d/arangodb3 start (code = exited,
status = 0/SUC
Tasks: 22
Memory: 158.6M
CPU: 3.117s
CGroup: /system.slice/arangodb3.service
├─2689 /usr/sbin/arangod --uid arangodb
--gid arangodb --pid-file /va
└─2690 /usr/sbin/arangod --uid arangodb
--gid arangodb --pid-file /va
Sep   04 05:42:33   ubuntu-512  systemd[1]:        Starting LSB:  arangodb...
Sep   04 05:42:33   ubuntu-512  arangodb3[2642]:  * Starting arango database server a
Sep   04 05:42:35   ubuntu-512  arangodb3[2642]:   {startup} starting up in daemon mode
Sep   04 05:42:35   ubuntu-512  arangodb3[2642]:   changed working directory for child
Sep   04 05:42:35   ubuntu-512  arangodb3[2642]: ...done.
Sep   04 05:42:35   ubuntu-512  systemd[1]:        StartedLSB: arang odb.
Sep   04 05:46:59   ubuntu-512  systemd[1]:        Started LSB: arangodb. lines 1-19/19 (END)
ArangoDB ahora está listo para usar.
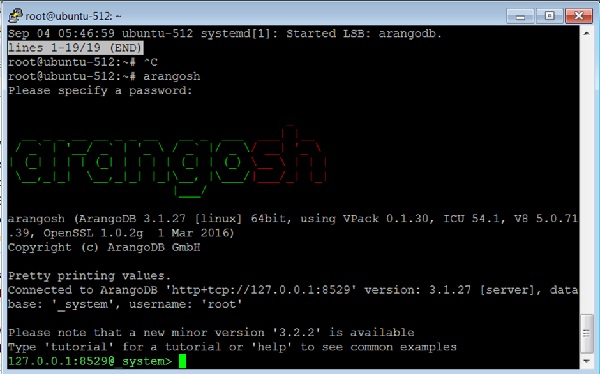
Para invocar la terminal arangosh, ingrese el siguiente comando en la terminal:
# arangosh
Please specify a password:
Suministro raíz contraseña generada durante la instalación –
_
__ _ _ __ __ _ _ __ __ _ ___ | |
/ | '__/ _ | ’  / ` |/ _ / | ’
| (| | | | (| | | | | (| | () _  | | |
_,|| _,|| ||_, |_/|/| ||
|__/
arangosh (ArangoDB 3.1.27 [linux] 64bit, using VPack 0.1.30, ICU 54.1, V8
5.0.71.39, OpenSSL 1.0.2g 1 Mar 2016)

Copyright (c) ArangoDB GmbH

Pretty printing values.
Connected to ArangoDB 'http+tcp://127.0.0.1:8529' version: 3.1.27 [server],
database: '_system', username: 'root'

Please note that a new minor version '3.2.2' is available
Type 'tutorial' for a tutorial or 'help' to see common examples
127.0.0.1:8529@_system> exit
Para salir de ArangoDB, ingrese el siguiente comando:
127.0.0.1:8529@_system> exit
Uf wiederluege! Na shledanou! Auf Wiedersehen! Bye Bye! Adiau! ¡Hasta luego!
Εις το επανιδείν!

להתראות ! Arrivederci! Tot ziens! Adjö! Au revoir! さようなら До свидания! Até
Breve! !خداحافظ
🚫